Visualizzazione post con etichetta cucina americana. Mostra tutti i post

lunedì 27 agosto 2012

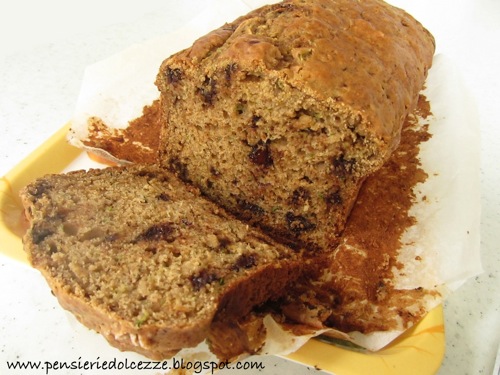
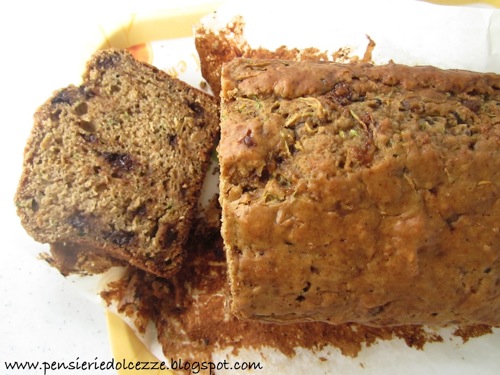
Zucchini Chocolate Bread

Buongiorno!
Non posso credere che MarsEdit, che usavo per postare, funzioni di nuovo!!! Rende tutto molto più facile e posso finalmente postare di più! :)
Ragassuoli, la Gaijina è in Italia, in vacanza, per ben più di due settimane!! E ci sono un sacco di novità. Ma prima… prima… Lasciatemi postare una ricettiva! Ce l'ho in serbo da settimane, e voglio assicurarmi  di riuscire a postare anche con foto allegate.
Allora se vagaste per il web, e vedeste questo, che cosa fareste? Io ho dovuto farlo subito. Avevo già sperimentato uno zucchini bread, senza il cioccolato, e ne ero rimasta molto soddisfatta, così… ne ho approfittato per provare una versione nuova. Che con l'aggiunta del cioccolato non può che essere ancora meglio! Qui la ricetta, con le mie modifiche.
Zucchini Chocolate Bread 4
Ingredienti:
3 cups farina
1 cucchiaio cannella
¼ cucchiaino di noce moscata
1 cucchiaino lievito
1 cucchiaino bicarbonato di sodio
½ cucchiamo di sale
2 uova
⅓ cup olio vegetale
¾ cup yogurt bianco
⅓ cup di buttermilk*
1 cup zucchero di canna
2 cucchiaini vaniglia
2 ½ cups zucchini grattugiati
113 g cioccolato fondente, a pezzettoni

* per fare il buttermilk, mettete in una cup 2 cucchiai di latte e poi riempitela di yogurt. Rimestate e usate.

Scaldate il forno a 180 gradi e rivestite di carta forno uno stampo per plumcake.
In una ciotola grande, mescolate insieme farina, cannella, noce moscata, lievito, bicarbonato, sale. 
In un'altra ciotola grande, sbattete le uova, poi unitevi lo yogurt, il buttermilk, l'olio, lo zucchero e la vaniglia. Infine, aggiungete gli zucchini grattugiati e il cioccolato a pezzi.
Unite il mix di farina agli ingredienti umidi e date una rimestata finché il tutto è combinato, poi versate nello stampo e cuocete per circa 50 minuti (vale prova stecchino). Lasciate intiepidire prima di sformare e tagliate da freddo.
Ottimo a colazione, con un ricciolino di burro spalmato sopra, con una bella tazza di caffè.
Zucchini Chocolate Bread 2

ZUCCHINI CHOCOLATE BREAD
If surfing on the internet, you would happen to see this picture, what would you do? I had to make it right away. I've already tried zucchini bread, so I decided to give the chocolate version a try. Didn't regret it :).
Ingredients:
3 cups All Purpose flour
1 Tbsp ground cinnamon
¼ tsp ground nutmeg
1 tsp baking powder
1 tsp baking soda
½ tsp salt

2 eggs
⅓ cup canola oil
¾ cup plain yogurt
⅓ cup buttermilk *
1 cup brown sugar
2 tsp vanilla
2 ½ cup finely grated zucchini
4 oz dark chocolate, chunked

* you can make the buttermilk pouring 2 Tbsp of milking a measuring cup, then filling the cup with yogurt and stirring.
Zucchini Chocolate Bread 1
Preheat the oven to 350 F, and cover a loaf pan with parchment paper. 
In a bowl, mix all the dry ingredients (the first 6 in the list above). In another large bowl, beat the eggs, then add the yogurt, the buttermilk, oil, sugar and vanilla. Combine well then add the grated zucchini and the chocolate and stir until combined. Pour batter into the loaf pan and bake for about 50 minutes.
Let cool 10 minutes before removing from the pan. Let cool completely before cutting.
Zucchini Chocolate Bread 3

martedì 7 agosto 2012

Chocolate chunks cookies

Ok ve l'avevo detto che ero in 'cookies mode', giusto? Ho fatto una pausa ma adesso è ora di proporvi l'ultimo! Andiamo per un classico, il chocolate chip cookie. Però io le gocce di cioccolato non le avevo quindi l'ho trasformato in un 'chocolate chunks'. Il gusto non cambia… Per la ricetta, mi sono strafidata di lei, perché semplicemente dopo aver visitato il suo blog non puoi non fidarti (e sbavare costantemente per le 6 ore e 10 minuti successivi).

Durante la preparazione ero un po' timorosa perché, fondendo il burro, l'impasto e' venuto molto molo oleoso, il che rendeva la formazione dei cookies non molto facile, e poi perché si sono espansi in cottura come gli altri, che utilizzavano il burro morbido, non avevano fatto. ma la volta precedente che avevo fatto i chocolate chip cookies si erano allargati anche loro, pur con una diversa ricetta, e chiedendo all'americano sembra che questi bisoctti siano proprio così, quindi… Insomma alla fine sono venuti diversi da come mi aspettavo, ma, finché son buoni, direte…. Beh, si, SONO BUONI! Moooolto più buoni di quelli che avevo fatto molto tempo fa, capisco perfettamente cosa intende Naomi con 'nutty aroma'. Ha ragione, li rende speciali. Unica pecca: ho fatto questi cookies per i bambini del fornitore dell'uomo, e noi ce ne siam pappati solo 4, giusto quanto servivano per poter farne la recensione. L'uomo mi ha chiesto se ai bambini potevo fare qualcos'altro…. -.-'.
Insomma, se vi capita, provateli!

NOTA: Io da quando ho aggiornato e installato Mountain Lion non riesco più a usare Mars Edit per postare... Qualcuno ha idea di come risolvere questo problema? Postando direttamente dal sito i post mi vengono con tre tipi diversi di carattere e una strana formattazione 'o'....
Ingredienti:
250 g farina
½ cucchiaino bicarbonato di sodio
200 g  burro (io ne ho usato meno, e ho fatto burro e margarina vegetale)
100 g zucchero
200 g zucchero di canna (credo di averne messo di meno perché mi sembrava troppo)
1 cucchiaino di sale
3 cucchiaini di vanillina
1 uovo grande
1 tuorlo grande
cioccolato fondente a pezzi
Scaldate il forno a 180C e rivestite la placca del forno con carta forno.
In una ciotola mischiate farina e bicarbonato.
Fate fondere 143 g di burro in un padellino. Fate cuocere ancora 1-3 minuti dopo che e' fuso, sempre mescolando, finché raggiunge un colore marroncino e odora di nocciole. Spegnete dal fuoco, filtrate in burro fuso in una ciotola e aggiungetevi i restanti 60 grammi, mescolate finché il tutto e' sciolto.
Unite lo zucchero al burro, poi unite il sale e la vaniglia, sbattete finché il tutto è ben amalgamato. Unite le uova e sbattete per 30 secondi, finché il composto è bello liscio. Lasciate riposare per 3 minuti poi ripetere l'operazione per altri 30 secondi. Ripetete 3 volte in tutto finché il composto è lucido e denso.
Unite la farina e il cioccolato (e le noci).
Formate i cookies con un cucchiaio da gelato, posizionandoli a una certa distanza l'uno dall'altro (si allargano). Cuocete una teglia per volta, girandola a metà cottura, per circa 10-14 minuti, fino a quando i cookies saranno dorati e non troppo piatti.

CHOCOLATE CHUNKS COOKIES
The first time I tried this 'Classic', I wasn't really impressed. The cookies came out flat and crunchy, hard, all melted in a single one huge unshaped cookie. The inside was row. Ugh!
Lately I've been in 'cookies mode', so I had to try again. When I saw this recipe, nothing could stop me.
I didn't have moscovado sugar so I used brown sugar instead. No nuts (the Man prefers without), chocolates chunks instead of chips, and less sugar, not because I didn't trust the recipe, but because I didn't have time to confirm the amount of sugar… The recipe calls for ½ cup go white (3 ½ ounces) and ½ cup brown sugar (6 ounces)??? I wasn't sure that was right, so… I think I used less than 7 ounces of sugar in total (white and brown). Also because I can't find light brown sugar here, and the one I've got is really dark brown with a strong sweet flavor.
I also used half butter and half Crisco, because I didn't have enough butter and 200 grams scared me. So I melted the butter and I added the Crisco at the same time of the sugars. I can't remember exactly how much of each I used, so I suggest to stick to the original recipe that can't be but better than mine.
My cookies were very good but cooking they spread more than I expected. I want to try again this recipe without changing a thing and see if they come out puffier. I was quite happy about them though, they were so tasty and delicious! I almost cried when I had to give them away to my boyfriend's supplier's kids. I don't think kids need cookies as much as I do. I saved some for us… I need a review. They were gone in 2 minutes. Approved!
Ingredients:
1 ¾ unbleached all purpose flour
½ tsp baking soda
14 Tbsp unsalted butter
½ cup granulated white sugar
¾ cup brown sugar
1 tsp salt
3 tsp vanilla
1 large egg
1 large egg yolk
1 ¼ cup chopped dark chocolate
¾ cup chopped nuts (didn't use them)

Jump here for how to make them!

NOTE: Since I updated and installed Mountain Lion on my Mac, Mars Edit doesn't work. Does anybody know how to solve this problem? Posting from the website my posts come out with three different format and the layout is also weird... 'o'


lunedì 9 luglio 2012

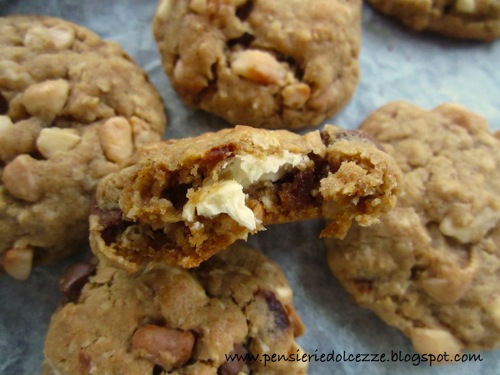
Cookies al cioccolato bianco e noci macadamia

Dalle Hawai'i mi sono fatta portare un paio di confezioni di Macadamia Nuts. Ho fatto scorpacciate incredibili laggiù, tra cookies e tutti i vari tipi di macadam che hanno li. Ne ho anche prese un bel po' come regalini, perché sono una cosa prelibata e unica, che non puoi non adorare se già ti piacciono gli altri tipi di noci. la macadamia hanno un gusto particolare, che si abbina a cioccolato bianco, nero, burro, caramello, caffè, miele e anche al salato. Insomma una bontà. Uno tra i miei cookies preferiti e' il white chocolate macadam nut cookies. Quindi mi son data da fare per le nostre giornate in spiaggia. Dopo aver visto la velocità' di sparizione di questi, non volevo rischiare di mettere su 2 kg in un pomeriggio, e mi son dovuto sacrificare e dividerli con gli amici… Non tutti, però! Ne ho conservati un po' solo per noi… Un buon caffè hawaiano Vanilla e Macadamia e questi biscotti e la giornata inizia alla grande!!! Peccato debba continuare in ufficio, però… Quando con la mente sei già in spiaggia con la tavola da surf accanto.

Whire Chocolate Macadamia Cookies 3

Ingredienti (circa 36 biscotti)

115 g burro
100 g zucchero
100 g zucchero di canna scuro
1 uovo
1 cucchiaino di vaniglia
190 g farina
5 g bicarbonato di sodio
1 pizzico di sale
5 g lievito
120 g fiocchi d'avena
140 g cioccolato bianco
40 g cioccolato al latte/fondente (se volete solo una parte dei biscotti con entrambi i cioccolati. Io per provare l'ho aggiunto solo a meta' impasto, ma ci sta da dio quindi consiglio di aumentare la dose a 140 g e di utilizzarlo per tutti i biscotti).
135 g noci macadamia spezzettate

Lavorate il burro a crema (a me che non ho il robot da cucina con il gancio a pala piace lavorarlo prima da solo, pi aggiungerci lo zucchero) con gli zuccheri, dopodiché aggiungete l'uovo e la vaniglia.
In un'altra ciotola mescolate farina, bicarbonato, lievito e un pizzico di sale. Unite il mix di farina al mix con l'uovo, mescolate bene. Unite i fiocchi d'avena, il cioccolato bianco e le noci macadamia. Date una rimescolata e mettete in frigo mentre preparate le teglie.

White Chocolate Macadamia Cookies 1

Accendete il forno a 180 C.
Preparate due placche da forno o teglia grandi, foderate il fondo con carta forno. Prendete l'impasto e fate delle palline con le mani, sistematele a una distanza di 4-5 cm l'una dall'altra sulle teglie.
Quando vi e' rimasto meta' impasto, aggiungete il cioccolato al latte/fondente spezzettato e mischiate. Continuate a fare le palline (io ho dovuto cuocere in due tempi).
Infornate per 10-15 minuti. Fate attenzione a non bruciare i biscotti e a tirarli fuori quando sono dorati ai bordi. Io ne ho fatti alcuni un po' più cotti per il sapore più intenso. Sono entrambi ottimi, una prelibatezza. Adoro i cookies americani! Ve lo avevo già detto??
Lasciateli raffreddare e conservateli in un contenitore ermetico fino a 3 giorni. Dopodiché inizieranno a seccare un po'.
Questi biscotti sono fantastici e sono passati in testa alla mia classifica personale! Fino a quelli dopo, che mi hanno creato problemi nella classifica…… Ma di quelli, vi parlerò in un altro post. Per ora… pucciate, azzannate e godete!!!!

Variante: Provate ad aggiungere un po' di polvere di caffè all'impasto per una carica golosa ancora più energetica!!!

White Chocolate Macadamia Cookies 4


WHITE CHOCOLATE MACADAMIA COOKIES

From Hawai'i I brought back a couple of packages of macadamia nuts because since I tried the macadamia cookies there, I couldn't stop thinking about making them, a tons of them, and eat them all. Actually, I did make them, and I did make a tons of them, but I didn't really eat them all… After these, Professor Bear and I agreed on sharing them with our friends, at the beach. We are both too weak to not finish them all in one night, completely out of control. But I secretly hid some for next day's breakfast…. Aaaahhhhh…..cookies! With an Hawaiian Vanilla Macadamia Coffee and these cookies, your day couldn't have a better start! It just sucks that, after this goodness, you still gotta go to work. Aw well… I know, I whine too much. I need another cookie!!!!

Ingredienti (about 36 cookies)

½ cup butter, softened
½ cup white sugar
½ cup brown sugar
1 egg
1 tsp vanilla
1 ½ cup all purpose unbleached flour
1 tsp baking powder
1 tsp baking soda
a pinch of salt
1 ½ cup instant oatmeal
¾ cup chopped white chocolate
¼ cup chopped milk chocolate/bittersweet chocolate (or more, I only made few cookies with both chocolate, but they were really good so I suggest you to use milk chocolate for all of them. Use ¾ cup of it)
6 oz dry roasted macadamia pieces for baking

White Chocolate Macadamia Cookies 2

Beat the butter and the sugars until creamy, then add the egg and the vanilla. In another town mix the flour with the baking soda, the baking powder and the salt. Add the flour mix to the egg mix, stir well. Add the oatmeal, the chocolate and the nuts. Stir and put in the refrigerator for a while.
In the meanwhile, switch on the oven at 180C (350F) and prepare 2 baking sheets with parchment paper. Take your cookie dough and make little ball using your hands or a gelato scoop. Place the cookies on the parchment paper keeping a 2 inches distance between them. They won't flatten while baking, but it's always good to make sure they have some space.
Bake for 10-15 minutes, until the edges start to get golden. For a crispier cookies, bake a couple of minutes longer, but keep an eye on them! Let the cookies cool on a rack and store in an airtight container up to 3 days.

Variant: Add a little coffee powder to the batter for an even more energetic goodness!!!!!

lunedì 2 luglio 2012

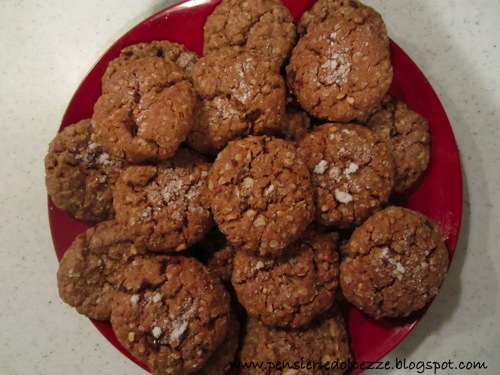
Cookies all'avena e burro d'arachidi

Siamo alle solite. Lo sapevo che non mi dovevo fidare di me! E' sicuro, certo, confermato: ho la sindrome del vasetto vuoto di burro d'arachidi. Un vasetto pieno non ci può stare in casa mia, e' come se non potessi proprio sopportarlo. E non c'e' nulla che mi possa guarire, dovrei semplicemente non comprarlo, SOPRATTUTTO quando alla Metro c'e' il vasetto da 560 g di cui 90 in regalo. Perché il Professore non mi ha fermato?? Perché? Forse perché lui non sa cosa fa la sottoscritta non appena capita che lui esce di casa e io resto da sola. E' quasi automatico, mi fiondo in cucina, salgo in piedi su una sedia per raggiungere lo scaffale alto in fondo dove ho nascosto (ma da chi? Da me stessa? illusa….) il famigerato Skippy Crunchy Peanut Butter, cucchiaino (quando non faccio ancora più schifo, e mi ci avvento col cucchiaio), e vai, giù uno dopo l'altro (sempre in piedi sulla sedia). Non faccio schifo? Secondo me si, soprattutto quando mi causa dolori di pancia per i 7 giorni successivi, eppure non smetto. Ma cosa devo fare?? Insomma tutta sta premessa per arrivare alla ricetta di oggi, un modo come un altro per far fuori quel che restava nel vasetto e farla finita coi mal di stomaco, almeno fino alla prossima volta che ci ricasco.
Ho fatto un miscuglio, tra ricette di oatmeal cookies e peanut butter cookies, questo e' quello che ne e' venuto fuori. 
Buoni, anche se un po' troppo dolci per i miei gusti -decisamente la prossima volta ridurrò lo zucchero- , ed esattamente come piacciono a me: soft, anzi meglio chewy, e restano così senza indurire o seccarsi per giorni, meglio se conservati in un contenitore ermetico. A me i cookies americani fanno impazzire, da soli o pucciati. In questi giorni ne ho preparati 4 tipi diversi (stay tuned!), tutti un successo! Però siam sempre li, con la storia dell'autocontrollo…. mi ammazzo in palestra per poi ammazzarmi di biscotti. Quelli che sono in forno adesso sono per i bimbi di un signore che lavora per Mister Bear… Li ho visti muoversi dappertutto e bruciare probabilmente 1000 calorie al secondo. non credo si faranno problemi a godersi i miei biscotti.
Oatmeal Peanut Butter Cookies 3
NOTE:  
Riducete drasticamente lo zucchero, io farei 120 g di bianco e 180 di canna.
- I biscotti non si allargano in cottura, ma mantenete in ogni caso la distanza fra uno e l'altro… non si sa mai.
- Non appiattiteli troppo con la forchetta, rendono al massimo da "panciuti", e ne rimane inalterata la morbidezza.

Ingredienti:
170 burro d'arachidi
100 g burro
1 cup zucchero
¾ cup brown sugar
1 cucchiaino di vaniglia
2 uova
200 g farina
5-6 g bicarbonato di sodio
6 g sale
3 g cannella
200 instant oatmeal (fiocchi d'avena)

Riducete il burro a crema con un cucchiaio, poi aggiungeteci il burro d'arachidi, mescolate bene per amalgamare, unite gli zuccheri e la vaniglia e sbattete con le fruste. Aggiungete le uova, una per volta, e amalgamate bene.
Oatmeal Peanut Butter Cookies 1
In un'altra ciotola combinate la farina, il bicarbonato di sodio, il sale, la cannella. Unite questo composto a quello delle uova, mescolate bene, poi unite i fiocchi d'avena. Amalgamate il tutto, e formate i biscotti facendo delle palline, sistemandole sulle teglie coperte di carta forno, distanti l'una dall'altra circa 2,5cm.
Inumidite una forchetta, poi pucciatela in un po' di zucchero, e schiacciate leggermente le palline, immergendo la forchetta nello zucchero ogni volta.
Cuocete a 180C per circa 10 minuti. Lasciate raffreddare prima di rimuovere i cookies dalla teglia.

I think i have a disease. I can't have a jar of peanut butter -doesn't matter how big it is-, without finishing it as fast as i can. i honestly don't think that's normal. That said, it wasn't probably a very smart idea to buy a 560 g peanut butter jar, just because 90 g were free. I wished someone had stopped me. But nobody did, so there i was, standing on a chair in the kitchen to reach the jar that I tried in vain to make it difficult to reach for a 5.2 ft piece of girl -me-, grabbing a spoon ready to sin.
After 7 days of stomach ache and tummy pain I had to think about a way to get rid of what was left. that how I made up these cookies, taking recipes here and there, mixing them in one new recipe, forgetting it, and trying to rewrite it. And there you go!
I love american cookies because they are chewy and they are perfectly good by themselves or dip in milk, coffee or caffelatte. In these last few days I'm baking so many different kinds I should really give it a break but…. but…. they are so awesome!!!!

Notes:
- Reduce the sugar, I would suggest 120 g of white sugar and 170-180 of brown sugar.
- The cookies don't spread in the oven, but it's always better to leave them a little space -2inches.
- Don't press them too hard with the fork, they give their best as soft, chewy, big puffy cookies if you leave them tall and 'plumpy' (word of my creation, -I love making up new words!- , hope you can get the meaning).

OATMEAL PEANUT BUTTER COOKIES
Ingredients (3 dozens)
170 g peanut butter (I added another couple of spoons)
100 g butter
1 cup white sugar
¾ cup brown sugar
1 tsp vanilla
2 eggs
200 g flour
5-6 g baking soda
6 g salt
3 g cinnamon
200 g instant oatmeal
Oatmeal Peanut Butter Cookies 2
Work the butter to make it creamy, then add the peanut butter and mix melt until combined. Add the sugars and beat well. Add one egg at a time, and vanilla, always mixing.
In another bowl mix the flour, baking soda, salt and cinnamon. Add the flour mix to the eggs mix, stir well. Finally add the oatmeal. Combine everything and you are ready to make the cookies!
Shape 1,5 inches balls and place them on a baking sheets with parchment paper. Keep a little distance between the cookies.
Bake at 180 C for about 10 minute. Let them cool before removing from the pan.
Oatmeal Peanut Butter Cookies 4

domenica 22 gennaio 2012

Reese's Pieces' Cookies

Abbiamo ricevuto un pacco dal Minnesota, con dentro la mia borsa per il baby Mac e una borsa da un chilo di Reese's pieces!!! Per evitare di farli fuori tutti quanti la sera davanti alla televisione, ho deciso di farci dei biscotti… Ho semplicemente fatto dei chocolate chips cookies, ma invece delle gocce di cioccolato ci ho messo dentro i Reese's pieces! Che per noi poveri italiani che non li abbiamo, sono come gli M&M, ma invece del cioccolato dentro hanno il burro d'arachidi. Yuuuuuummmmm!!!!!
Buoni buoni buoni, sono morbidissimi e se conservati in un contenitore airtight si mantengono cosi fino a una settimana. Ma tanto non arriveranno mai a una settimana… Perfetti da mangiare cosi, o da pucciare, hanno una capacita' assorbente… strepitosa!!
Ecco la ricetta, presa da qui:
IMG 1508
Ingredienti:
2 ¼ cups di farina
½ tsp bicarbonato di sodio
200 g burro morbido (dovrebbe essere 230 (=1cup), ma ho diminuito che mi sembravano già più che sufficienti)
1 cup zucchero
½ zucchero di canna
1 tsp sale
2 tsp vaniglia
2 uova grandi o 3 piccole
Reeses's pieces (a piacere)

Mischiate farina e bicarbonato in una ciotola. In un'altra, riducete il burro a crema con entrambi gli zuccheri; aggiungete sale, vaniglia e le uova, continuate a sbattere. Aggiungete la farina e mescolate con un cucchiaio giusto per amalgamare gli ingredienti. Aggiungete i Reese's pieces.
IMG 1507
Sistemate delle palline di impasto ben distanziate su una placca da forno (io ne ho cotti 6 per volta), se volete potete schiacciarle leggermente, ma occhio perché si allargano molto. Cuocete a 180° per 10-15 minuti. I bordi saranno dorati ma al centro ancora morbidi e pallidi.
Lasciate raffreddare su una griglia. Gustate e … siate felici!
IMG 1510
IMG 1514

REESE'S PIECES COOKIES
I got more than a kilo of Reese's pieces from the US, the party bag, that would have been easily gone in 3 nights in front of the Tv if i didn't use them to bake cookies. I used this recipe, a recipe for normal chocolate chips cookies, just instead of the chocolate chips, I used the Reese's pieces. Awesome!!! They are chewy and soft and sooo tasty! They are perfect by themselves and perfect soaked in milk or coffee, I love american cookies! They simply have the perfect fixture! We had friends'  kids over tonight, and we made pizza, meatballs and focaccia, and after all that, they got cookies! how lucky kids they are! They simply loved them! And we loved them too. Too bad the Reese's pieces are really gone now.
IMG 1512
Ingredients:
  • 2 1/4 cups all-purpose flour
  • 1/2 teaspoon baking soda
  • 1 cup (2 sticks) unsalted butter, room temperature
  • 1/2 cup granulated sugar
  • 1 cup packed light-brown sugar
  • 1 teaspoon salt
  • 2 teaspoons pure vanilla extract
  • 2 large eggs
  • Reese's pieces (as many as you want)

  • Preheat oven to 350 degrees. In a small bowl, whisk together the flour and baking soda; set aside. In the bowl of an electric mixer fitted with the paddle attachment, combine the butter with both sugars; beat on medium speed until light and fluffy. Reduce speed to low; add the salt, vanilla, and eggs. Beat until well mixed, about 1 minute. Add flour mixture; mix until just combined. Stir in the chocolate chips.
  • Drop heaping tablespoon-size balls of dough about 2 inches apart on baking sheets lined with parchment paper.
  • Bake until cookies are golden around the edges, but still soft in the center, 8 to 10 minutes. Remove from oven, and let cool on baking sheet 1 to 2 minutes. Transfer to a wire rack, and let cool completely. Store cookies in an airtight container at room temperature up to 1 week.
IMG 1516

mercoledì 7 dicembre 2011

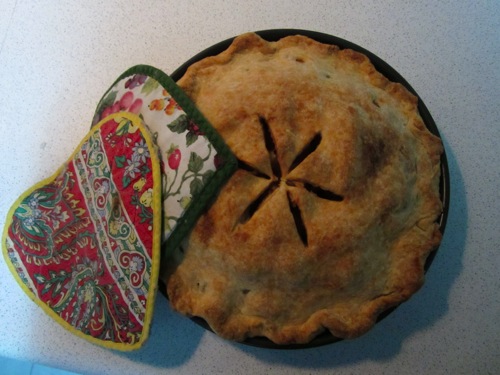
Apple Pie

Per finire coi miei dolci per il Thanksgiving, vi propongo un classico americano: la Apple Pie.
Ho preso la ricetta da qui, perche' questa versione mi ha colpita particolarmente, perche' risolveva quello che era il mio dubbio più grande, ovvero: come fa il liquido di tutte queste mele a non inzuppare la base rendendo la torta gnecca? Questa ricetta, che, lo devo ammettere, e' un pochino lunghetta, prevede un tempo di "riposo" delle mele condite, che vengono lasciate a scolare in modo da perdere gran parte del loro liquido. Il liquido pero', ovviamente, non si butta! Viene fatto ridurre fino a renderlo un bel caramello cremoso, e poi viene riaggiunto alle mele.
A dire la verità, qui l'espediente e' usato per evitare che le mele si riducano di volume in cottura, causando un vuoto tra esse e la copertura. Ma risolveva anche il mio, di problema, e' stato subito utilizzato!
La ricetta, ora! Ah, volete una recensione? Allora, considerando che:
- era la prima Apple Pie che ho mangiato
- era la prima Apple Pie che ho fatto
- il 95% dei commensali era americano, più me e due cinesi
- i commensali di cucina se ne intendono abbastanza, visti i piatti che hanno preparato,
e' stata un successo. Addirittura hanno fatto una classifica di tutti i dolci e hanno dato a questa il primo posto. Considerati i due cheesecakes fantastici che c'erano e l'altro dolce con le patate dolci, ne sono stata onoratissima.
Basta ciance, ora, al lavoro, che di tempo ce ne vuole (sia a farla che a scriverla… :( )
IMG 0929
APPLE PIE
Ingredienti
per il ripieno:
1 Kg di mele (che tengano bene la cottura) sbucciate e tagliate a fette di ½ cm
50 g zucchero
55 g light brown sugar
1-2 cucchiai di succo di limone
1 tsp cannella
¼ tsp sale
30 g burro
15 g amido di mais
Cominciate preparando le mele: in una ciotola capiente, mischiatele bene col succo del limone, gli zuccheri, il sale e la cannella, poi lasciatele a temperatura ambiente dai 30' alle 3 ore.
Intanto potete passare alla base.

per la pasta brise':
350 g farina
1 tsp sale
30 g zucchero
226 g burro freddissimo
60-120 ml acqua ghiacciata
Mischiate bene farina, sale, zucchero. Poi aggiungete il burro, già tagliato a cubetti piccolissimi e rimesso in frigo, e lavorate con la punta delle dita fino ad avere un miscuglio granuloso. Se avete un robot da cucina, usate quello… fortunati voi.
Dopodiche', cominciate ad aggiungere l'acqua, pian piano, partendo dal minimo (60ml) e aggiungendone, se necessaria, a cucchiai. Un cucchiaio basta a fare la differenza, quindi occhio a non aggiungerne troppa! Impastate brevemente fino a quando vedete che l'impasto sta insieme e non si sbriciola. Fate una bella palla allungata, tagliatela in due, sistemate una parte su un pezzo di pellicola e stendetela con le mani in un disco, coprite con pellicola, fate lo stesso col secondo disco e mettete entrambi in frigo per un'ora.
A quest'ora le mele dovrebbero esser pronte. Passato il tempo necessario, rovesciatele in uno scolapasta sotto al quale avrete messo un'altra ciotola adatta al microonde, e lasciatele scolare. Avranno rilasciato un bel sughetto che dovete raccogliere quanto più riuscite. Dopo 15-30' avrete più o meno ½ cup di succo.
Prendete dal frigo 1 disco di pasta, infarinate il piano di lavoro e stendetelo in un disco di 30 cm, mantenendo una forma rotonda, poi ripulitelo il più possibile dalla farina in eccesso e disponetelo in una teglia da 23 cm imburrata. Fate un bel bordo, eliminate l'eventuale pasta in eccesso, coprite con pellicola e rimettete in frigo.
IMG 0918
IMG 0919
IMG 0920
Prendete il secondo disco, stendetelo in uno di 30 cm, disponetelo su una teglia, copritelo con pellicola e rimettete in frigo.
Prendete la ciotola col succo delle mele (dovreste avere circa ½ cup), aggiungetevi il burro e bollite al microonde per 5-7 minuti, fino a quando avrete ottenuto un bel liquido profumatissimo e denso, un vero e proprio caramello speziato
IMG 0921
IMG 0922
Mentre il succo cuoce, tirate fuori la pasta dal frigo, e mischiate le mele con l'amido di mais. Poi aggiungete il caramello caldo, mescolate bene, e rovesciate il tutto nel disco di pasta.
Inumidite i bordi della brise' e ricoprite le mele col secondo disco, pizzicandolo sotto i bordi del disco superiore. Sbizzarritevi con l'abbellimento dei bordi (ok, i miei fan schifo, perche' ho fatto il secondo disco troppo grande e pizzicarlo sotto e' stata un'impresa), poi fate dei tagli di 5 cm partendo dal centro della torta, coprite con pellicola e mettete in frigo mentre scaldate il forno.
IMG 0925
IMG 0926
Scaldate il forno a 220 gradi, sistemando la placca da forno nel livello più basso in modo che diventi bella calda. Sistemate la Apple Pie sulla placca da forno e cuocete per circa 50 minuti, fino a quando i bordi sono belli dorati e, se inserite un coltello in uno dei tagli, sentirete le mele morbide ma non spappolate. Io ho coperto i bordi con dell'alluminio dopo i primi 30 minuti e l'ho rimosso 5-10 minuti prima di spegnere. Oppure potete metterlo subito e rimuoverlo nell'ultima fase della cottura.
IMG 0927

Lasciate raffreddare un paio d'ore prima di tagliare, anche se sara' difficile resistere… Avrete un profumino inebriante per tutta la casa!
Servite tiepida o a temperatura ambiente, possibilmente con una pallina di gelato alla vaniglia.
Il che mi fa venire in mente un bell'apprezzamento che e' stato fatto alla torta: io il gelato non l'avevo portato, perché qui non e' semplice trovarlo che non faccia schifo o non ti mandi in bancarotta, e c'era stata un po' di delusione… Ma poi quello che si lamentava di più ha assaggiato la torta e ha detto che era ottima e lo dimostrava il fatto che era fenomenale anche senza pallina di gelato! Meglio di così…. :)
IMG 0967
Insomma, una torta assolutamente da rifare, perfetta per una merenda golosa, una domenica pomeriggio, quando fuori fa freddo, e si ha voglia di coccole, sul divano, davanti a un bel film...

giovedì 1 dicembre 2011

Thanksgiving's Pumpkin Bread

Il nostro Thanksgiving e' stato sontuoso, Ricchissimo, esagerato. Quando mi e' arrivato il menu' mi sono quasi sentita male. Come avremmo mai potuto finire tutte quella roba?? Antipasto messicano, bruschette, salumi e formaggi, 20 tipi di chips, 2 tacchini, stuffing, gravi, cranberry sauce, stufato di manzo alla Guinness, purea, Shepherd's Pie, broccoli con salsa al formaggio, corn soufflé', green beano casseruole, e poi i dolci!! 2 meravigliosi cheesecakes con salsa al cioccolato e espresso e blackberry sauce, un dolce alle patate dolci e marshmallows (lo posterò, già presa la ricetta….),  e i due miei.
A me sono stati chiesti la Pumpkin Pie e l'Apple Crisp, ma io ovviamente ho fatto di testa mia, e ho provato qualcosa di nuovo (a dir la verità', anche l'Apple Crisp e' una novità, pero' io in realtà avevo iniziato a pensare ai dolci per il Thanksgiving un mese fa!
E così ho fatto, e giuro che nessuno si e' lamentato, anzi.
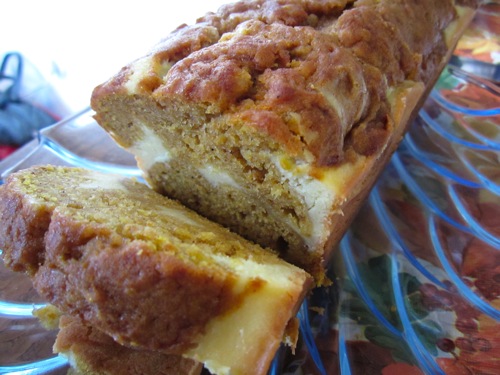
Il primo che posto e' il Pumpkin Bread perche' Ale lo voleva vedere e perche' e' talmente buono che merita di essere provato anche senza alcuna occasione speciale, ma per una perfetta merenda o colazione autunno/invernale. E' ottimo.
Il Grunting Bear ha insistito per tagliarlo e servirlo mentre aspettavamo il tacchino, e l'abbiamo mangiato ancora tiepido. Una vera goduria, anche a me e' piaciuto moltissimo. E poi i complimenti mai scontati del Grunting Bear mi hanno cissata alla grande!! Ahahhahahha! la ricetta, ora!
IMG 0946
PUMPKIN BREAD WITH CREAM CHEESE FILLING (ricotta presa da qui)
Ingredienti per due plumcakes
per il cream cheese filling:
250 g Philadelphia
100 g zucchero
2 uova grandi
1,5 Tbsp farina

per il pumpkin bread:
450 g farina
1 tsp bicarbonato di sodio
1 tsp lievito
¾ tsp sale
1,5 tsp cannella
4 uova grandi
400 g zucchero
220 g burro fuso e freddo
425 g purea di zucca
½ cup acqua
1,5 tsp vanillina

Se volete, potete aggiungere anche 1 cup di noci tostate e spezzettate grossolanamente e un pizzico di noce moscata.
Cominciamo col ripieno: sbattete il Philadelphia per renderlo cremoso, poi aggiungete lo zucchero, sbattete, poi le uova a una a una. Non sbattete troppo, amalgamate solo. infine, mescolateci la farina.
Passiamo all'impasto base: in una ciotola, mescolate bene farina, bicarbonato, lievito, sale e cannella.
In un'altra ciotola, sbattete le uova, poi unitevi lo zucchero e il burro sciolto, sbattete e infine incorporate la polpa di zucca, l'acqua e la vanillina. Unite il composto di farina e mescolate giusto per amalgamare, non troppo!
Ungete e infarinate due stampi da plumcake, mettete un po' del composto in ciascuna, più o meno ¼, poi dividete il ripieno tra i due stampi, livellate bene, infine concludete col composto restante, facendolo cadere a cucchiaiate sopra il ripieno al formaggio.
IMG 0934
Cuocete in forno pre-riscaldato a 180° per un'oretta (vale prova stuzzicadenti).
Aspettate 10 minuti prima di sformare.
IMG 0936
Godetevelo tiepido o scaldato al microonde, volendo con un velo di burro salato, insieme a una tazza di caffe'.

PUMPKIN BREAD WITH CREAM CHEESE FILLING (from here)
Ingredients

for the cream cheese filling:

8 ounce package (227 grams) cream cheese, room temperature
1/2 cup (100 grams) granulated white sugar
2 large eggs
1 ½ Tbsp all purpose flour

For the Pumpkin Bread:
1 cup (110 grams) pecans or walnuts (I didn't add them)
3 1/2 cups (450 grams) all purpose flour
1 teaspoon baking powder
1 teaspoon baking soda
3/4 teaspoon salt
1 1/2 teaspoons ground cinnamon
1/4 teaspoon ground nutmeg (didn't add it)
4 large eggs
2 cups (400 grams) granulated white sugar
1 cup (226 grams) unsalted butter, melted and cooled
1 - 15 ounce (425 grams) can pure pumpkin
1/2 cup (120 ml) water
1 ½ tsp pure vanilla extract
IMG 0945
Preheat the oven to 350 degrees F (177 degrees C) and place rack in the center of the oven. Butter and lightly flour two - 9 x 5 x 3 inch (23 x 13 x 8 cm) loaf pans.
To toast nuts: Place the nuts on a baking sheet and bake for about 8 - 10 minutes or until brown and fragrant. Cool completely and then chop coarsely.
Cream Cheese Filling: In your food processor, process the cream cheese just until smooth. Add the sugar and process just until smooth and creamy. Add the eggs, one at a time, processing just until incorporated. Do not over process. Stir in the flour.
Pumpkin Bread: In a large bowl, sift or whisk together the flour, baking powder, baking soda, salt, cinnamon, and nutmeg.
In another large bowl, whisk the eggs until lightly beaten. Add the sugar and melted butter and whisk until blended.  Whisk or stir in the pumpkin, water, vanilla extract, and nuts.
Add the flour mixture to the pumpkin mixture and stir just until the ingredients are combined. (A few streaks of flour is fine.) Do not over mix as it will make the bread tough.
Divide the batter in half. Take one half and divide it evenly between the two prepared pans. Divide the cream cheese filling in half and place each half of filling on top the two pans of batter, smoothing the tops. Top with the remaining half of batter (use two spoons to place small dollops of batter on top of the filling). Bake the breads for about 55 -65 minutes, or until a toothpick inserted into the center of the loaf comes out clean.
Place pans on a wire rack and let cool for about 10 minutes before removing breads from pans. Can serve warm, cold, or at room temperature. Store leftovers in the refrigerator or else freeze for later use.
Makes 2 loaves.
IMG 0937
It was just wonderful!! Stephanie Jaworski is just a genius and her website is great! All her recipes always come out perfectly.

IMG 0974

mercoledì 2 novembre 2011

Spaghetti with meatballs… like Lady and the Tramp

Scommetterei qui su due piedi che tutti, tutti tra voi, dalle coetanee alle neo-mamme e I neo-papà, alle mamme e ai papà con figli già grandi, si ricordano della tipica scena in cui Lilly e il Vagabondo cenano a suon di fisarmonica mangiando un enorme, succulento piatto di spaghetti con le polpette.
Oh, che ci crediate o no, io gli spaghetti con le polpette li associo solo al film, e a casa mia non li ho mai mangiati. Che ve devo di’, a casa mia si mangia la pasta, e dopo si mangiano le polpette, di solito con l’insalata. Ma non mischiate.
Quando Grunting Bear l’ha scoperto, dapprima non mi ha voluta credere, poi ha persino googlato il termine e ha trovato questo: "...though Spaghetti with meatballs are rare in Italy there are Italian precursors: I have had spaghetti with tiny meatballs in Puglia,  meatballs were a common addition to feast day pasta sauces in Sicily...”, e così si è convinto. Però ha voluto scrivere una mail a sua mamma per dirle che non avevo mai mangiato spaghetti e polpette in vita mia! Ma si può?
Insomma, alla fine tutto sto sproloquio perché il menù di ieri è stato proprio questo. Siamo andati a fare la spesa sabato e poi, domenica, dopo aver smaltito un po’ la sbornia della serata Halloween, ci siamo messi all’opera per una cena anticipata o, come diremmo coi piemontesine, una merenda sinoira.
E questo è il risultato, buono buono buono, lo devo ammettere. Però decisamente troppo per la sera.

IMG_0599

Ingredienti per il sugo:
2 scatole di pelati a pezzi
olio evo
sale, zucchero
basilico fresco (io non l’ho messo, non l’avevo)
2 spicchi d’aglio
1/2 cipolla tritata
paprika o peperoncino fresco

Ingredienti per le polpette (per tante polpette):
700 g macinato (di solito mischio maiale e manzo)
2 uova
parmigiano grattugiato
sale, pepe
prezzemolo tritato
1 patata bollita
pane ammollato nel latte freddo

Preparate la salsa, facendo rosolare cipolla e aglio nell’olio evo, e aggiungendo la salsa di pomodoro quando dorati. Io di solito sciacquo le lattine e uso l’acqua col sugo rimasto per allungare il sugo a piacimento. Sale, pizzico di zucchero, noi le volevamo piccantine quindi ci ho aggiunto un peperoncino, fate cuocere a fuoco medio-basso per 20 minuti, girando di tanto in tanto e schiacciando bene I pezzi di pomodoro.
Mentre il sugo cuoce fate le polpette: mischiate il tutto e amalgamate bene bene. Considerando la consistenza, saprete se è il caso di aggiungere una spruzzata di latte o del pangrattato o se van bene così.
Preparate un piatto con del pangrattato e fate delle palline tutte delle stesse dimensioni col composto, rotolatele nel pangrattato e mettetele su un piatto. Lui mi ha aiutata, facendo inizialmente delle polpette ENORMI, che a me scappava da ridere ma non volevo ferire I suoi sentimenti visto che si impegnava tanto. L’ho lasciato finire e intanto io friggevo le polpette in poco olio. Non devono cuocere, solo “chiudersi”, fatele dorate appena da entrambi I lati e poi tuffatele nel sugo che continuerete a cuocere –con le polpette dentro- per altri 20 minuti. Io ogni tanto aggiungevo un po’ d’acqua perché ci abbiamo messo dentro troppe polpette Smile with tongue out! Le polpette erano tante quindi nel sugo ce ne ho messe solo alcune, abbiamo preparato le altre e conservate in frigo per l’indomani.
Preparate I vostri spaghetti scolandoli al dente e condendoli con sugo abbondante, una bella spolverata d parmigiano e, se ce l’avete, il bel tocco verde del basilico fresco! Et voilà!

IMG_0596

Mio padre commenterebbe sdegnato che mangiamo sugo e pasta anziché pasta al sugo, o parmigiano e pasta anziché viceversa, ma papino non c’è quindi… occhio non vede, cuore non duole, e finalmente posso fare a modo mio senza sguardi di rimprovero… E ovviamente ne approfitto.

IMG_0598

SPAGHETTI WITH MEATBALL WITH HOMEMADE SAUCE

As I explained above in italian, I know that this is not a dish very common in Italy –as a matter of fact, I never had it before, reason for which my boyfriend was so making fun of me.
Anyway, I also know perfectly well that the pasta sauce used in the States most of the times is not homemade, and not even half as good as an homemade one. I taught my boyfriend how to make a basic italian pasta sauce, he loved it and when he went home he remade it for his mum, sister and nieces, and they all loved it and wanted to learn. Now they call it “Ele’s sauce”, and I’m just so happy they liked it!
So, here to share! It’s so easy, fresh and tasty in its simplicity that once you learn it, you’ll never buy another one from the store.

IMG_0595

Ingredients for the sauce:
2 can of chopped peeled tomatoes
extra virgin olive oil
2 cloves of garlic
1/2 onion, finely chopped
salt
a pinch of sugar
fresh basil
a red chillie pepper (if you like it spicy)

Ingredients for the meatballs (actually, for a lot of meatballs!)
700 g ground meat (I mix beef and pork)
2 eggs
1 boiled potato
1 slice of bread, soaked in cold milk (you can use the old bread… that’s how we do it)
finely chopped parsley
salt
pepper
grated parmesan

Let’s start with the sauce. Heat the oil (almost enough to cover the bottom), when hot add the garlic and the chopped onion. When golden, add the tomatoes, stir well, rinse the cans adding that water to the sauce, add some salt, a pinch of sugar, the chillie if you like. Cover and cook at low-medium heat for 20 minutes, stirring once in a while.
In the meanwhile, make the meatballs. Mix all the ingredients together, mix well, if you think it’s too soft to be shaped, you can add some bread crumbs, if it seems too hard, add a little milk.
Prepare a plate wish bread crumbs, then start to make the meatballs, all of the same size, rolling them in the bread crumbs.
Heat some oil and fry the meatballs, just until slightly golden, turn them only once. Then put them in the sauce and let it cook for another 20 minutes. You’ll have a lot of meatballs, to many for the sauce, so you can store some in the refrigerator and cook them tomorrow.
While the meatballs are cooking, boil some water for the spaghetti, when it’s boiling add some salt and the spaghetti. Let them cook for about 8 minutes (don’t overcook!), then drain and add as much sauce and meatballs as you want!
Finish with a good sprinkling of grated parmesan and, to give it a nice touch, with some fresh basil leaves. Sit down and just enjoy!

IMG_0597

There! The only reason for which I’m familiar with this dish and I’ve always wanted to try it! It looks just sooo tasty!!!

images2
Related Posts Plugin for WordPress, Blogger...